A great booth layout is more than just where you place a table or hang a banner—it’s the foundation of your entire trade show experience. From how visitors enter and interact with your brand, to how your team moves around the space, layout shapes flow, engagement, and outcomes.
Whether you’re designing a 10×10 booth or managing a larger footprint, the principles of smart layout planning stay the same. This step-by-step guide will walk you through the key decisions that go into creating a booth layout that works—not just looks good, but performs.
Step 1: Set Clear Goals for the Booth
Before you sketch a single line, you need to know what your booth is meant to do. Is your goal to:
- Showcase a new product?
- Generate leads?
- Host demos or meetings?
- Increase brand visibility?
Your goals will shape your layout. For example, a demo-heavy booth needs space for screens and attendees to gather. A lead-focused setup might prioritize open walkways and interaction stations.
Ask yourself:
“What do we want people to do in our booth?”
Step 2: Know Your Booth Size and Regulations
Trade shows come with rules. Once you’ve confirmed your booth size (typically 10×10, 10×20, 20×20, etc.), review any:
- Height restrictions
- Electrical access points
- Line-of-sight or sightline rules
- Setback or clearance requirements
Ignoring these early on can result in costly changes later—or worse, a booth that doesn’t meet show compliance.
Tip: Ask show organizers for a booth space layout, including location of power and neighboring booths.
Step 3: Map Out Visitor Flow
Your layout should guide people naturally through the space. Think of your booth like a mini retail environment—you want visitors to enter, explore, engage, and exit without congestion or confusion.
Key principles of visitor flow:
- Keep the entrance wide and open
- Avoid barriers (like tables) between staff and attendees
- Direct attention toward a focal point: demo, product, or display
- Allow space for both quick interactions and deeper conversations
Use directional cues—like signage, lighting, or flooring—to subtly guide movement.
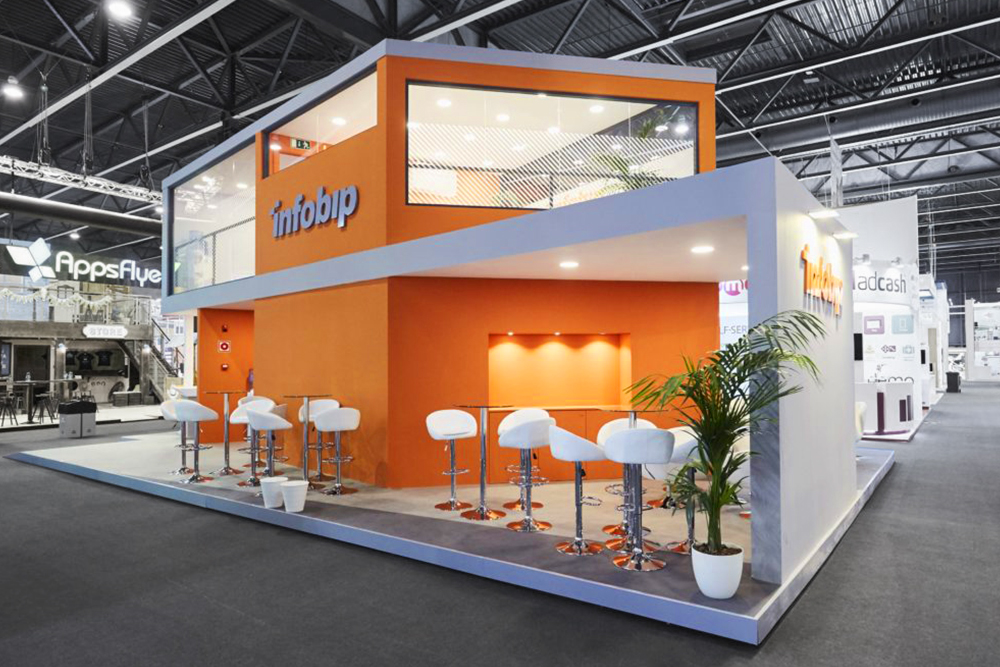
Step 4: Designate Zones with Purpose
Even small booths benefit from functional zones. Divide your space based on the types of interactions you expect to have.
Common booth zones:
- Greeting area: Where staff can say hello, scan badges, or hand out materials
- Demo/display area: Highlight your product or service with hands-on interaction
- Meeting or discussion space: A small table or stools for longer conversations
- Storage: Hidden area for brochures, giveaways, or personal items
Defining zones helps staff stay organized and improves the visitor experience.
Step 5: Choose Furniture That Works for You (Not Against You)
Furniture often becomes a bottleneck in booth layouts. A giant table or bulky counter can block traffic and make the space feel smaller. Instead, choose pieces that support movement and interaction.
Tips for choosing booth furniture:
- Use tall counters to create quick conversation zones without taking up much floor space
- Opt for stools or standing tables instead of chairs and lounges
- Consider modular displays that serve dual purposes (e.g., counter + storage)
- Leave enough room behind the counter for staff to move freely
Think vertical—use shelving or towers to free up the floor.
Step 6: Plan for Technology Integration
Technology is a valuable part of modern trade shows—but it has layout implications. You’ll need to factor in power sources, cable management, and placement for screens or tablets.
Common tech layout needs:
- Monitor mounts or tablet kiosks
- Charging stations or USB hubs
- Space for AV or lighting equipment
- Cord covers or flooring that hides cables
Tip: Always test your tech setup before the show. Make sure nothing obstructs movement or line of sight.
Step 7: Don’t Forget Staff Space
Your team needs to be able to do their job comfortably. Plan for where they’ll stand, move, and store personal items. A cluttered booth with nowhere for staff to go creates a chaotic environment—and visitors pick up on that.
Consider:
- Hidden storage bins or cabinets
- A designated “reset” area for team breaks or quick regrouping
- Clear spacing between team members and visitors
A relaxed, confident team adds as much to your booth presence as any graphic or light fixture.
Step 8: Test Your Layout Before the Show
If you can, mock up your booth in a warehouse, office, or even your garage. Tape out dimensions on the floor, set up tables, and walk through as if you’re an attendee.
This dry run lets you:
- Spot layout issues early
- Practice setting up displays or tech
- Train your team on flow and positioning
It’s better to make changes at home than during setup on show day.
Final Thoughts
Planning your booth layout isn’t just about making space—it’s about designing an experience. The right layout guides attendees to engage with your brand naturally, feel welcomed, and stay longer. It helps your team stay focused, your messaging stay clear, and your booth perform at its best.
So take the time to plan intentionally. The success of your next trade show may depend on it. We recommend Trade Show Booth Design.